UINavigationBar定制的正确姿势

系统导航栏(UINavigationBar)的定制一直以来都是一个比较棘手的问题,特别在iOS11以后导航栏视图结构发生了改变,导致之前很多解决方案都不再适用。由于导航栏图层独立于控制器视图,所以你可以隐藏掉导航栏使用自己绘制的导航栏仅使用导航控制器的视图栈,但本文不推荐这种方式。

本文采用的方式依然在系统导航栏的基础上进行配置。这么做的好处有很多,首先系统导航栏视图层独立于控制器视图,控制器视图加载于UINavigationTransitionView,导航栏的UINavigationBar与它是平级关系,多数情况下我们是复用它的。其次不用去自己管理复杂的视图层级关系以及滚动视图的调整行为。

导航控制器的层级关系:

1
2
3
4
UITransitionView
┗ UILayoutContainerView
┣ UINavigationTransitionView (控制器视图绘制在这个层级)
┗ UINavigationBar

导航栏的定制化可分为导航栏渲染配置、以及导航栏控件配置两个部分

不同版本系统导航栏视图结构

首先我们来分析一下iOS11前后导航栏(UINavigationBar)的视图结构

iOS11以前:

1
2
3
4
5
6
7
UINavigationBar
┣ _UINavigationBarBackground
┃ ┗ UIImageView (阴影视图)
┣ UILabel (自定义头视图,可为任意类型)
┣ UINavigationItemView
┣ ...
┗ _UINavigationBarBackIndicatorView

iOS11:

1
2
3
4
5
6
7
8
9
10
UINavigationBar
┣ _UIBarBackground
┃ ┣ UIImageView (背景视图)
┃ ┗ UIImageView (阴影视图)
┗ _UINavigationBarContentView
┣ UILabel (自定义头视图,可为任意类型)
┣ _UIButtonBarStackView
┃ ┣ _UITAMICAdaptorView
┃ ┗ ...
┗ ...

定制导航栏

_UINavigationBarBackground -> _UIBarBackground

通过对比,iOS11在导航栏视图上将层级更加细分。iOS11之后多了一层_UIBarBackground视图,背景图及阴影视图位于一个层级。iOS11之前设置背景图,使用setBackgroundImage:forBarMetrics:方法会直接作用在_UINavigationBarBackground上,iOS11之后会在_UIBarBackground下添加一个新的背景视图。但是使用setBarTintColor:方法,依然会着色于父层级。

通过查看系统API得知,barTintColor属性默认为nil,如果想要改变导航栏背景图和阴影图,我们只需要通过setBackgroundImage:forBarMetrics:setShadowImage:两个方法即可,po上代码:

1
2
3
4
5
6
7
8
9
10
11
12
13
14

//设置导航栏背景视图
[__navigationBar setBackgroundImage:[UIImage imageWithColor:App_Background_Color] forBarMetrics:UIBarMetricsDefault];
//去除下阴影线
[__navigationBar setShadowImage:[UIImage imageWithColor:[UIColor clearColor] size:CGSizeMake(_ScreenWidth, 0.1)]];
//渲染图标
[__navigationBar setTintColor:App_NaviBar_Tint_Color];
//设置标题样式
[__navigationBar setTitleTextAttributes:@{
NSForegroundColorAttributeName : App_NaviBar_Tint_Color,
NSFontAttributeName : App_NaviBar_Text_Font
}];
//设置不透明
[__navigationBar setTranslucent:NO];

ps:设置想要阴影线透明,在使用setShadowImage:方法时,可以设置高度为0.1,若为0则有可能不生效

UINavigationItemView -> _UINavigationBarContentView

内容视图的变化是导致之前设置样式失效的最大原因,iOS11所有的UIBarButtonItem都是加载到新的_UIButtonBarStackView上的,而_UIButtonBarStackView默认在5.5英寸机型有20px其余机型为16px的边距,UIBarButtonSystemItemFixedSpace也无法使用了。非常幸运,通过不断的尝试,找到了同时完美兼容多系统版本的定制化方案。UIBarButtonItem的initWithCustomView:方法,为我们创造了无限的可能性。

你是不是看到这里想到些什么?

我们重新造一个XXNavigationItemContainerView容器,通过initWithCustomView:方法加载到导航栏上,那么在XXNavigationItemContainerView视图上,我们就能做很多定制化操作了。

可能看到这里你你会觉得非常抽象,我们先看XXNavigationItemContainerView.h提供的接口以及调用

1
2
3
4
5
6
7
8
9
10
11
12
13
14
15
16
17
18
19
20
21
22
23
24
25
26
27
28
29
30
31
32
33
34
XXNavigationItemContainerView.h


typedef NS_ENUM(NSUInteger, XXNavigationItemContainerLocation) {
ZMCNavigationItemContainerLocationLeft = 0, //对应leftBarButtonItem
ZMCNavigationItemContainerLocationRight, //对应rightBarButtonItem
};

@interface XXNavigationItemContainerView : UIView

@property (nonatomic, assign) XXNavigationItemContainerLocation location;
/**
容器视图所包含view,view必须指定frame.size.width
*/
@property (nonatomic, strong) NSArray <UIView *>*items;

/**
初始化导航栏Custom容器视图

@param loc 容器视图所在位置
@return ins
*/
- (instancetype)initWithContainerLocation:(XXNavigationItemContainerLocation)loc;

@end

===

ViewController.m


_naviBarItemsLeftContainer = [[ZMCNavigationItemContainerView alloc] initWithContainerLocation:ZMCNavigationItemContainerLocationLeft];
_naviBarItemsLeftContainer.items = @[self.backItem];
self.navigationItem.leftBarButtonItem = [[UIBarButtonItem alloc] initWithCustomView:_naviBarItemsLeftContainer];

通过这样的方式,我们只需要向Container添加元素,Container会根据添加顺序自动渲染出视图,并通过initWithCustomView:接口设置到导航栏的内容视图上。

通过setItems:方法实现容器对元素的渲染这里就不再赘述,之前有讲过_UIButtonBarStackView在5.5英寸机型有20px其余机型为16px的边距,这里来讲讲如何解决这个问题。

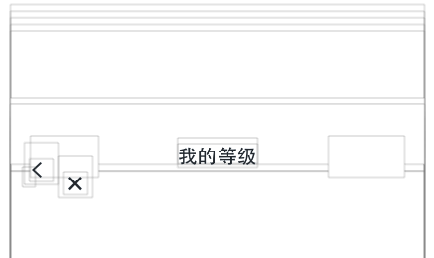
根据UI视觉上的具体参数,我们可以在将元素渲染进容器时调整它的整体偏移,类似这个效果:

我们可以使用宏或者函数的方式,获取不同机型上的偏移,并且修正它,这是很容易做到的。但是这么做以后,你会发现超出父视图部分的点击事件,无法响应了。解决这个问题就涉及了事件响应链(hit-test)相关的知识了,请自行学习,这里只讲实现和解决方案,po上代码:

1
2
3
4
5
6
7
8
9
10
11
12
- (BOOL)pointInside:(CGPoint)point withEvent:(UIEvent *)event{
CGRect expectFrame;
switch (self.location) {
case XXNavigationItemContainerLocationLeft:
expectFrame = CGRectMake(-NaviBar_Item_Offset, 0, self.bounds.size.width, self.bounds.size.height);
break;
case XXNavigationItemContainerLocationRight:
expectFrame = CGRectMake(NaviBar_Item_Offset, 0, self.bounds.size.width, self.bounds.size.height);
break;
}
return CGRectContainsPoint(expectFrame, point);
}

这里我使用NaviBar_Item_Offset来定义所需修正的偏移量,在触摸事件发生响应链寻找最佳匹配视图时,修正视图位置信息并将其与触摸位置进行匹配,返回结果